This past February, I attended to the SuperWeek Conference in Egerszalók / HU, where I decided to participate on the Punchcard Prize with a new tool that I had been using interally over the past years. The only difference is that I used to use it with some command line interface and for releasing it I build my first Window application ever ( beside an NFO Viewer for an European demogroup back in the years ).
After being in a closed Beta for a few weeks and fighting for 2 weeks to get my company certified for a code signing certificate. I’m releasing my Android Debugger to everyone.
.
This new tool will allow anyone to easily debug any Firebase (GA4) , GTM ( Limited Info ) and Universal Analytics ( GA3 ) implementations on any Android App.
I created some videos showing up all the current version features and how to use it in a detailed video with even some voice over. These are the main features:
Firebase ( GA4 )
View the events ( included the autogenerated ones, session_start, app_background, etc ) batches in real time, including all the info included the event parameters , user properties, audiences, and any other internal payload data.
Google Tag Manager
This is a work in progress report. Right it will allow to see which containers are being loaded, which events are being triggered and the list of varibles being evaluated. ( note this is not app based and it will report all the hits coming from the current connected device )
Google Analytics ( GA3 )
Most of you should be used to the data on this report, it basically report the Universal Analytics ( GA3 ) hits payloads ( note this is not app based and it will report all the hits coming from the current connected device )
More Features
But this are not the only features it includes, two of the most painful points when needed to debug an Android App are:
1. Installing the USB Drivers 2. The need of using libraries or modifying the manifest file
I’ve some good needs this is not longer an issue with Android Debugger . You will be able to debug any app installed on your physical device or emulator, ( yep, I said ANY ), without needing to modify or ask the developers to make any updates or deploying any debug version.
And if you’re using Android +11, you’ll be able to pair your device with the debugging just scanning a QR code. Yep, that’s right, no more risk searching for USB drivers on forums, no more issues trying to have your computer properly recognizing your device!
Of course if you still prefer it you can install the drivers and debug your device using the USB connection, whatever you prefer!
And last but not least, you will be able to cast/control your device screen from the debugger, which will allow you to record your debugging sessions ( remember the debugger shows the data in real time ), or you ‘ll be able to share your debugging with clients/co-workers ) . How cool is that?. I have to mentions this feature is offered by scrcpy ( I wish I was remotely capable of writing something like that! ).
Note: The current installer/tool is signed, but Windows needs some installs in order to verify the application, because of this some of you may be getting this message. Just click on the Run Anyway button.
The first time you run the tool, you’ll be asked to input a license key, don’t worry since this is FREE. Just click on the link provided to create a new account and get a free license.
More notes
Some people may get a windows notification about the app wanting to use the networks, this happens when you want to do the Wireless Pairing, which is basically what Windows alersts you about. This will only be shown once.
Support
I’m offering this tool as “it is” , and I’ll be trying to make improvements and updates as long as my daily work allows me to work on it. In you have any bug report/comment please reach me on Twitter.
Purchard Prize. It reads: “THE VERY FIRST POST-COVID19 BRONZE PUNCHCARD PRIZE #SUPERWEEK ANALYTICS SUMMIT”Me, trying not to collapse during my presentation on the SuperWeek 2022. I ended on the 3rd position.
It took me almost a year ( once again ) to have a new version, but this time I did the things properly, I’ve restarted the tool totally from scratch, I re-did the dev environment, I re-coded the detections code, I changed the CSS Framework, I updated the JS backend.
There have been hundreds of commits, hundreds of hours , and so much fun and learning in the process. If you ask me the main features beside the more accurate reporting are the new Preview Enhancer and the new full support for Google Analytics 4.
GTM/GA Debug 1.0.0 Splash Screen
In the other side, I’ve reestructured the whole tool allowing me now publishing standalone functions/ fixed individually ( which was not possible before and the main reason for not having some regular updates ).
The are a lot of new cool stuff in the upcoming features queue, so stay tunned :).
Now, before listing some of the new stuff, I would like to mentioned that you can support this tool in some several ways,
Buying me a coffee : Yep, I can’t stop eating or even dring, but I won’t go far without my daily coffee doses.
This weekend I was doing a, long-due, room cleanup and I found buried in the bottom of a drawer an old hard I was using some years ago. Within it’s content I found one folder named “WIP” ( Work In Progress ) and there I found some experiments, tools and proof of concepts I was working on 4-5 years ago and that got lost on the desk drawer when I upgraded my computer to a SSD drives.
It seems that at some point I was playing around with some way of doing a “storage-less” session tracking for Universal Analytics.
We’ll be relying on the window.name to keep our clientId across our user’s navigation journey. There will be some handicaps of course, but at some point someone may find these handicaps a reasonable price for keeping their users privacy in place.
The window.name property is used for setting targets for hyperlinks ( if you even wondered how some sites can open links on some specific window/tab ).
Another good point is that is widely supported. While on JavaScript 1 it was a only read property since JavaScript 1.1 it’s a read/write.
window.name browser compatibilty
With all this said, let’s started setting up everything for our tracking in Google Tag Manager , we’ll be only need 2 variables, one will be simple JavaScript Variable that we’ll be using for reading the clientId from the window.name property back to the tracker (Universal Analytics Tag ), and a customTask Variable for writing the clientId.
We’ll just need 2 variables for getting the tracking in place, one will trying to read the clientId from the window.name property and will return undefined if it’s not set. For sanity reasons, we’re encoding the clientId using BASE64 and using a prefix to properly detect if the current stored value stored is valid. We’ll be using this variable as the clientId field in our tags:
The second one, it’s pretty simple customTask variable , that we’ll grabbing the clientId from the tracker model and writting it down to our window.name property.
Now that we have everything, let’s configure our tags, we’ll need to set the “storage” and “cookieUpdate” fields to none and false to properly prevent our tracker to set any cookie.
Since we want to make this 100% GDRP/Privacy compliant, we’re seeting the storeGac to false and we’re switching on the IP anonimization.
We’re all set now. Our clientId will be kept as long as the user stays on the current tab. This means that the client won’t be kept if:
Open a links on a new tab/window ( target: _blank or right clicking on a link )
I know this tracking approach won’t be enough for most of users, needing to keep the current users cross-session state across sessions, but it will be enough if we only want to track sessions.
Also, take in mind that the mainly pourpose of this post is showing a way
If I were asked about some missing feature on Google Analytics 4 ( a.k.a. APP+WEB, New Web Analytics ), I would say it would be the lack of the customTask functionality that my friend Simo has leveraged in the last years.
Sadly at the moment there’s nothing similar available ( I really hope to have something in the future ). In the past I collaborated on this Brian Clifton’s post/code about How to Remove PII from Google Analytics, So I decided to base the redacting logic on it, just because a lot of people may have already some custom regex list and setup that could be re-used on here.
How it works
Google Analytics 4 bases it’s tracking on using navigator.sendBeacon for sending the hits, and falling the old-fashined new Image() functionality if for any reason the current browser doesn’t support the first one.
What we are doing in Monkey Patching the browser’s sendBeacon functionality using a Proxy Pattern. In order to remove any PII (Personally Identificable Information) from hits payload before they reach the Google Analytlics 4 Endpoint.
Monkey patching is a technique to add, modify, or suppress the default behavior of a piece of code at runtime without changing its original source code. It has been extensively used in the past by libraries, such as MooTools, and developers to add methods that were missing in JavaScript.
I don’t expect GA4 to be failing over the new Image hits many times, but I’m currently working on adding some support for also redacting the hits being sent using this method.
Before going forward
Monkey Patching “never is” a the right way to go, but neither Google Analytics 4 or sendBeacon offers anything to achieve this functionality, so it’s the last option to go.
The current code, only tried to override the hits going to Google Analytics 4 endpoint, and leaves any other hits to go in a transparent mode. I’ve also tried to check everything I was able to think of in order to prevent any issues.
The only thing you need to do is running the attached code to your site, “before” GA4 fires any hit.
If you are using Google Tag Manager you should be using the Tag Secuencing for firing the code before the Config tag is fired, refer to the next screenshot for more details:
If you’re using Tealium, you should run this as a “Pre Loader” extension for example.
Example of Redacted GA4 Payload Hit
The Code
(function() {

    /*
    *
    * Analytics Debugger S.L.U. 2021 ( David Vallejo @thyng )
    *  MIT  License
    * All redact Logic is ran within this function
    *
    */
    window.__piiRedact = window.__piiRedact || false;
    var piiRedact = function piiRedact(payload) {
        // Regex List
        var piiRegex = [{
            name: 'EMAIL',
            regex: /[^\/]{4}(@|%40)(?!example\.com)[^\/]{4}/gi,
            group: ''
        }, {
            name: 'SELF-EMAIL',
            regex: /[^\/]{4}(@|%40)(?=example\.com)[^\/]{4}/gi,
            group: ''
        }, {
            name: 'TEL',
            regex: /((tel=)|(telephone=)|(phone=)|(mobile=)|(mob=))[\d\+\s][^&\/\?]+/gi,
            group: '$1'
        }, {
            name: 'NAME',
            regex: /((firstname=)|(lastname=)|(surname=))[^&\/\?]+/gi,
            group: '$1'
        }, {
            name: 'PASSWORD',
            regex: /((password=)|(passwd=)|(pass=))[^&\/\?]+/gi,
            group: '$1'
        }, {
            name: 'ZIP',
            regex: /((postcode=)|(zipcode=)|(zip=))[^&\/\?]+/gi,
            group: '$1'
        }];

        // Helper Convert QueryString to an Object
        var queryString2Object = function queryString2Object(str) {
            return (str || document.location.search).replace(/(^\?)/, "").split("&").map(function(n) {
                return n = n.split("="),
                this[n[0]] = decodeURIComponent(n[1]),
                this;
            }
            .bind({}))[0];
        };
        // Helper Convert an Object to a QueryString
        var Object2QueryString = function Object2QueryString(obj) {
            return Object.keys(obj).map(function(key) {
                return key + '=' + encodeURIComponent(obj[key]);
            }).join('&');
        };
        // Convert the current payload into an object
        var parsedPayload = queryString2Object(payload);
        // Loop through all keys and check the values agains our regexes list
        for (var pair in parsedPayload) {
            piiRegex.forEach(function(pii) {
                // The value is matching?
                if (parsedPayload[pair].match(pii.regex)) {
                    // Let's replace the key value based on the regex
                    parsedPayload[pair] = parsedPayload[pair].replace(pii.regex, pii.group + '[REDACTED ' + pii.name + ']');
                }
            });
        }
        // Build and send the payload back
        return Object2QueryString(parsedPayload);
    };
    if (!window.__piiRedact) {
        window.__piiRedact = !0;
        try {
            // Monkey Patch, sendBeacon
            var proxied = window.navigator.sendBeacon;
            window.navigator.sendBeacon = function() {
                if (arguments && arguments[0].match(/google-analytics\.com.*v\=2\&/)) {

                    var endpoint = arguments[0].split('?')[0];
                    var query = arguments[0].split('?')[1];
                    var beacon = {
                        endpoint: endpoint,
                        // Check for PII
                        query: piiRedact(query),
                        events: []
                    };
                    // This is a multiple events hit
                    if (arguments[1]) {
                        arguments[1].split("\r\n").forEach(function(event) {
                            // Check for PII
                            beacon.events.push(piiRedact(event));
                        });
                    }

                    // We're all done, let's reassamble everything
                    arguments[0] = [beacon.endpoint, beacon.query].join('?');
                    if (arguments[1] && beacon.events.length > 0) {
                        beacon.events.join("\r\n");
                    }
                }
                return proxied.apply(this, arguments);
            }
            ;
        } catch (e) {
            // In case something goes wrong, let's apply back the arguments to the original function
            return proxied.apply(this, arguments);
        }
    }
}
)();
Some years ago I wrote a post about how to Track html5 videos which has been widely used and copied around the web. 2 years ago I wrote a total new tracking code , which I never publicly released.
Today I’m releasing a total new refactored code, for tracking HTML Media Elements. This means tracking <video> and <audio> elements.
This is my first library that I’ve build thinking on it about being a full library to be used along any project, instead of being a snippet to be used on a Google Tag Manager Tag. Because of this I’m providing the library in the following formats AMD, UMD, IIFE and ESM . So it can be used anywhere. At the same i’m providing a CDN access via jDelivr.
The library will take care of initializing the tracking and pushing the data back to Google Tag Manager ( using a dataLayer.push ), to Tealium ( using a utag.link ), or just to the console . Along with the event a full data model will be sent, with some details about the current event and the video ( the video title, duration, visibliity status, etc ).
The current data model is based on Google Tag Manager’s Youtube Tracking Trigger / Model, making available the use of the current in-built video variables on GTM.
The library will take or tracking the current videos on the page, but will also be able to “detect” newly added elements on the page ( like videos added on modals , or loaded programmatically ), that will also be tracked with no hassles. Just setting observe switch to true will enable the use of the Mutation Observer API ( where available ), to do this work for you,
This is not all, along with this new library I’m releasing a Google Tag Manager Custom Template, will makes event easier the setup, just adding the template along with a DomReady Trigger and you’ll be done.
HTML Media Elements Custom Template
Using a custom Video Title
When using HTML Media Element, we don’t have a way to pass any video details, this library will allow you to customize the current video Title being reported.
< video src="" data-html-media-element-title="Demo Video version 1">
This will make the VideoTitle to be reported as “Demo Video version 1“, is there’s not data-attribute the library will use the current video file name
Passing back video details
Not only you can pass the video Title library is totally eases the work of passing back to the events using data-elements.
You can pass all the custom data you need about the video to have it passed back to the tracking events. To achieve this we can all the data we want to the videos using data-attributes.
This can be done using data-attributes with the following format:
All the data added to the <video> elements will be passed back to events so you can used them.
For example:
< video width="400"
controls
data-html-media-element-param-band="Neil Zaza"
data-html-media-element-param-song-name="I'm Alright"
data-html-media-element-param-category="Music"
data-html-media-element-title="video test">
    <source src="mov_bbb.mp4" type="video/mp4">
    <source src="mov_bbb.ogg" type="video/ogg">
    Your browser does not support HTML video.
</video>
This will turn on have a videoData (or audioData) object passing the data this way:
Tag Management System we are using . Accepted values: “gtm”, “tealium”, “debug”
datalayerVariableNames
array
If the TMS is Google Tag Manager, we can push the data to an specific dataLayer , by default the library will search for the current dataLayer variable name
debug
boolean
Enable debug output to console
observe
boolean
Automatically track newly added video/audio elements
data_elements
boolean
data-html-media-element-title attribute will be used for elementTitle if provided
start
boolean
Track Audio/Video Start Event
play
boolean
Track Audio/Video Play Event
pause
boolean
Track Audio/Video Pause Event
mute
boolean
Track Audio/Video Mute Event
unmute
boolean
Track Audio/Video Unmute Event
complete
boolean
Track Audio/Video End Event
seek
boolean
Track Audio/Video Seek Event
progress
boolean
Track Audio/Video Progress Events
progress_tracking_method
boolean
‘percentages’ or ‘thresholds’ // thresholds not available yet
progress_percentages
array
Array of % where we should fire an event
progress_thresholds
array
TBD
We will be able to track the current HTML Media Elements Events ( Start, Play, Pause, Mute, Unmute, Complete, Seek, Progress ). We’ll just need to set to true the events we want to track within the init config variable.
Along with the events the library pushes some details about the video.
Data Model
Key
Value Example
Description
event
gtm.audio/gtm.video
Current Media Element Type
Provider
html5
Fixed value, describes the current media element provider
I must admit it, I like to use data-attributes for user clicks interactions rather than delegating that work on the IT team or relying on the class/id attributes. ( Data Attributes Tracking ) .
For Universal Analytics, this was some kind of easy work, since we had some fixed data attributes names (category, action, label, value when talking about events, or pagepath if we wanted to use a virtual pageview ). With the new event based tracking model on Gooogle Analytics 4 ( GA4 , formerly APP+WEB ), this has change, and we have a single hit type which is going to be an “event” all the time, but them we have an unlimited possiblities of parameter names.
On this post I’ll showing my approach to automate the events tracking on Google Analytics 4 using data attributes. Let’s go for it.
First we’ll need a data-attribute named “data-ga4-event” , this one will allow us on the next steps to setup a CSS Selector to trigger our tags.
Then for the events parameters we’ll use the following format: data-ga4-param-{{PARAM_NAME}} . Note that data attributes use kebab-case, so we’ll using is as “clicked-link-url”
DATA ATTRIBUTES
data-ga4-event
{{event name}}
data-ga4-param-{{PARAM_NAME}}
one per each needed parameter
Data Attributes Definition
Let’s now see some examples. A simple event without parameters will look like this:
and if we need to pass some paraemters it will look like:
<a href="https://twitter.com/thyng"
    data-ga4-event="social_link_click"
    data-ga4-param-social-network-name="twitter"
    data-ga4-param-social-network-user="thyng"
>Follow me on Twitter</button>
You may now be thinking, that would need a separate JS snippet for each event, but we’ll be using some JS magic to automatically convert this data attribute tagging on dataLayer pushes automatically.
(function() {
    // Grab all tagged elements
    var events = document.querySelectorAll('[data-ga4-event]');
    var unCamelCase = function(str, separator) {
        separator = typeof separator === 'undefined' ? '_' : separator;
        return str.replace(/([a-z\d])([A-Z])/g, '$1' + separator + '$2').replace(/([A-Z]+)([A-Z][a-z\d]+)/g, '$1' + separator + '$2').toLowerCase();
    }
    for (var i = 0; i < events.length; i++) {
        events[i].addEventListener('click', function(event) {
            var target = event.currentTarget;
            if(target){
                var dl = {}
                dl['event'] = target.dataset['ga4Event'];
                Object.entries(target.dataset).forEach(function(e) {
                    var key = e[0];
                    var value = e[1]
                    var m = key.match('ga4Param(.+)');
                    if (m && m[1]) {
                        dl[unCamelCase(m[1],'_')] = value;
                    }
                })
                window.dataLayer.push(dl);
            }

        });
    }
})()
The snippet above will take care of building a dataLayer push each time a click is performed on a element that has a data-ga4-event attribute, and will take also care of converting all data-param-X attributes in snake_case parameters within our event push.
As example our previous example:
<a href="https://twitter.com/thyng"
    data-ga4-event="social_link_click"
    data-ga4-param-social-network-name="twitter"
    data-ga4-param-social-network-user="thyng"
>Follow me on Twitter</button>
Of course you could add some more feature to this snippet, for example for automatically sanitizing the values before the push is sent, or you could build some black list to prevent any non-predefined event to go into your reports.
It’s been a long time since the last post, even more since the last extension update. To be exact it took me around 1 year to have this new version ready.
The main reason for this delay was that I switched how the extension is built at least 5 times. I don’t consider myself a developer which implies that many times I end choosing not the best stack I should. Anyway this has been a real opportunity for my to learn a lot of new technologies/frameworks I didn’t know about or just I never was able to understand, just to mention some: React / Svelte , WebPack, Rollup, Git, Gulp, Trevis. So at this point I’m really “happy” of all the time “wasted” on refactoring the extension so many times.
In case you’re interested after these so many changes, I ended building the extension using Vue.js 2 and Bulma as the CSS Framework. This has allowed me to build an extension that it’s faster, it’s build on top of some good tecnhologies ( instead of having thousand of non-efficient JS code lines ).
I know that for most people most of the changes won’t be noticiable, mostly because I tried kept the UI as it was in the previous version, but internally everything is different, while also como new features where added.
In the following video, I’m showing an overview of what the new extension has to offer:
GTM/GA Debugger Features
GTM/GTAG Debug Support
Multiple dataLayer Support ( View all the dataLayer pushes and current state )
View all Universal Analytics Hits being sent
View all GA4 (App+Web) Hits being sent
Filter out the hits by the type or property/stream ids
Filter out the dataLayer pushes by their type ( core, ga4, custom, etc )
Parse Hits payload to see a human.friendly keys translation
Enhanced Ecommerce Report ( based on GA/GA4 hits )
All Reports are in Real Time
Copy any Hit/dataLayer push info to the clipboard in a friendlyu format within a mouse click
Trace any Hit/dataLayer push
Real Time GA hits Payload debugging
More …
I really lost track all everything that was added on this specific release, so I’m providing a quick Changelog
Changelog
[NEW] – Now it’s based on Vue2.js + Bulma
[NEW] – GA4 Hits Full Support
[NEW] – GA4 Ecommerce Support
[NEW] – Multiple dataLayer Support
[NEW] – Multiple GTAG/GTM Containers support
[NEW] – Copy hits as string
[NEW] – Hits Stack Trace Reporting
[NEW] – Hits Debug ( run the hits againts official GA debug endpoint )
[NEW] – DataLayer Pushes Stack Trace Reporting
[NEW] – GTM Preview Enhancer
[ENHANCEMENT] – Debugging can be started clicking on a button rather than needing to press F5
[ENHANCEMENT] – Pushes/Hits timing are now correct and are shown in the real order they are triggered
[ENHANCEMENT] – UI is now more responsive, showing a better interface when using it in the sidebar
[FIX] – All bugs reported ( sites where the tool was not working properly ) has been addresses . Thanks to everyone that helped on reporting
[FIX] – Incogonito Mode Support
[FIX] – GA detection for hits non-send to GA endpoints
[FIX] – GTM detection locally served containers
[FIX] – +40 Tickets og bugs.
As you may noticed some tools are gone: the Data Attributes Inspector and the Profiler Tab Report, I removed this feature for this release in order to focus on the tool reliability, they will be added back on the next releases.
More news about the extension is that it will be available for Firefox, Opera and Edge ( as soon as I can’t have it approved on their marketplaces )
Now I’m looking for some betatesters that will help me on identifying issues on some new releases. Yay!.
Last big new is that hit the 40.000 users this past week. Yeah, according to Chrome Store data, the extension is being used by more than 40K users weekly, I’d never thought the tool was end having these many users, but also this created some “responsability” at my side that I’m currently not sure how to handle it.
In the last year I declined all the extension puchase offers and also I didn’t accept any offer for adding ads within the tool, I really want to keep this tool free of ads, but it really takes lot of time. Because of this I decided to start accepting donations via Ko-Fi, Getting some help this will allow to publish updates more regularly. This is some totally opcional, I’ll keep working on the extension anyway, but some people in the past asked for being able to help.
Click on the button below if the extension has been helpful for your work:
Now if you are not still using the extension you can get it for free in the following link: INSTALL EXTENSION
I know this is just currently a draft but being it available on Chrome, Edge and Opera ( or any chrome based browser ) make this really usefull in my opinion.
In those browsers, there’s a API that allows to get the details about the current connection of the current user. We cab query some info like the current “estimated” connection link, the round-trip ( latency ), based on the recently observed requests by the browser.
All these details can be queried via the Network Information API on the supported browsers. I know if not much widly adopted yet, but according to canIuse it’s supported by around a 70% of browser globally, it’s not perfect but I think it’s enough, with the time more browser should be end adding support for it.
We can query (at this moment) for the following details:
On this we’ll focusing on the effectiveType since is the attribute that is widly available on the browsers. We need to have in mind that is NOT the real connection type of the user, but the current “effective” connection type. Meaning that is an estimation based on the measured network performance for the previous/current requets. This value is actually calculated based on the maximun download speeds and the minumun RTT values recently observed.
This mean that an user may really be under a fiber connection, connected via Wifi with a very bad link and the effectiveType may report 2g. but since we are talking about the “effective” we should be fine
This reported value is calculated based on the following table:
It’s been a long time since I took care of this blog’s “Analytics” ( In the blacksmith’s house, a wooden knife). And I noticed that would be cool having the info about the Anchor Text the sites referring to my sites are using to link me.
So I’m sharing the solution I built today in order to capture which Anchor Text was on the referring URLs and sending the info back to Google Tag Manager and from there we’ll be able send an event to APP+WEB or to any other place we want 🙂
How it works
Execution Flow Chart
The flow chart on the right side, shows how the executions flow works. We’ll have 2 main pieces:
– One GTM CUSTOM HTML Tag – One PHP File
The first one will the responsible of doing the main logic and doing a XMLRequest call to the second one that will take care of reading the current visitor referrer page and scrape it in order to try to find the current Anchor Text that the user clicked.
We’re using extense logic to void any kind of false positives/duplicate hits. For example when an user goes back into a mobile phone or swipes. We don’t want to consider these “page reloads” as landings despite they may still hold a valid referrer info.
SERVER SIDE CODE
PHP Snippet Code
First we need to upload the following php snippet to any server supporting PHP 7.x ( because of the use of arrays literals ).
This code can be highly improved for example for adding a timeout in the case the page is not reachable. If someone asks I may adding more sanity check for the script.
NOTE Remember that the following code needs to be added to GTM wrapped between <script></script> tags!
Also remember that we need to update the endPointUrl value to the domain where we’ve uploaded the PHP script
  (function(){
    try{
	  var endPointUrl = 'https://domain.com/getLinkInfo.php';
      // We don't want this to run on page reloads or navigations. Just on Real Landings
      if (window.performance && window.performance.navigation && window.performance.navigation.type === 0) {
          var referrer = document.referrer;
          var current_url = document.location.href;

          var grab_hostname_from_url = function(url) {
              var h;
              var a = document.createElement("a");
              a.href = url;
              h = a.hostname.replace('www.', '');
              return h;
          }
          // Only continue if the current referrer is set to a valid URL
          if (referrer.match(/^(?:http(s)?:\/\/)?[\w.-]+(?:\.[\w\.-]+)+[\w\-\._~:/?#[\]@!\$&'\(\)\*\+,;=.]+$/)) {
              // current referrer domain != current_domain
              console.log(grab_hostname_from_url(grab_hostname_from_url(referrer).indexOf(grab_hostname_from_url(current_url)) === -1))
              if (grab_hostname_from_url(referrer).indexOf(grab_hostname_from_url(current_url)) === -1) {
                  fetch(endPointUrl+ '?url=' + referrer).then(function(response) {
                      return response.json();
                  }).then(function(json) {
                      json.forEach(function(link) {
                          if (current_url.indexOf(link.url)>-1) {
                          //if (current_url===link.url.indexOf) {
                              window.dataLayer.push({
                                  event: 'incoming-link',
                                  linked_url: link.url,
                                  landing_url: document.location.href,
                                  referring_url: referrer,
                                  anchor_text: link.linkText
                              });
                          }

                      })
                  });
              }
          }
      }

    }catch(e){}
  })();
Now we’re only one step away of having this working, we’ll need to setup a firing trigger for our tag, this ideally should be the All Pages trigger to get it fired asap.
Reported Data Info
dataLayer Key
dataLayer Value
event
incoming-link
linked_url
Current Link in the Referral Page
landing_url
Current URL
referring_url
Full Referrer Info
anchor_text
The Anchor Text on the referrer page linking to your site
Caveats
Please note that this solution relies on the current document.referrer, so don’t expect it to work for all referrals since some of them may be stripping the full referrer info, like Google SERPS do, or even some browser may end stripping the referrer details down to origin for privacy reason.
Also it may happens that the referring URL is linking to us in more than 1 place, on this case the scraping endpoint will return all the links and anchors texts matching. From that point of, it’s up to you how you report it in Google Analytics or any too 😀
In any case this should work for most of the common referrals traffic.
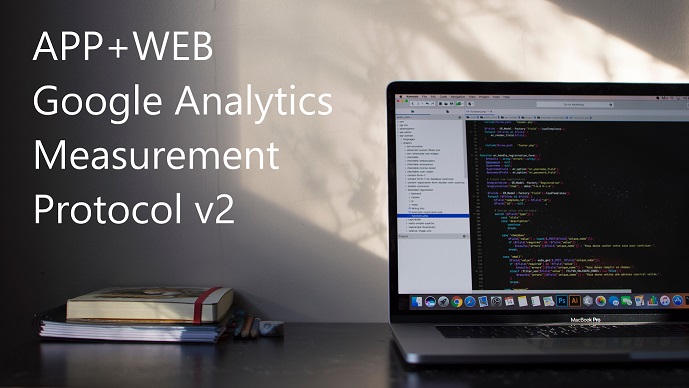
The Google Analytics Measurement Protocol allows users and developers to make HTTP requests directly to Google Analytics endpoint in order to measure how users interact from any enviroment/platform.
Since Google announced the new APP+WEB Properties back in summer, we noticed that the &v parameter that used to hold a fixed 1 value turned to be a =2 value in our hit requests. Which implicitily means that at some point a new version of the Measurement Protocol is going to be released.
I tried to reverse-engineer all the details I could about the parameters used on this new upcoming protocol.
Please have in mind that the , and I’m publishing all the info I was able to gather.
Introduction
The new Measurement Protocol cames with some great new improvements over the version 1 that we’re used to see in our Universal Analytics hits.
I’d try to think about this new protocol as an enhanced version of the previous one. They even share some parameters.
What’s new on the version 2 protocol
This new measurement protocol seems to had been designed having some performance optimizations in mind.
First thing we need to have in mind is that APP+WEB doesn’t longer have “hit types“, everything we may end sending to APP+WEB is an “event” that may (or may not) be accompanied with parameters.
There 2 groups of parameters in the APP+WEB Measurement Protocol . Let’s think about them as the event parameters “scope“.
Event Related Parameters ( ep.* , epn.* )
User Related Parameters ( up.* , upn.* )
Also the parameters accepts 2 diferente values types:
Batched Events
Now by default APP+WEB Protocol allows to send batched events, meaning that with a single hit request we’ll be able to send multiple events. I know this is not new at all, and we ever needed to debug an APP implemention we’d have noticed that version 1 protocol allowed us to send batched hits ( via /batch endpoint ).
In any case v2, comes with some extra enhanced comparted with the legacy version,
Events within a single hit request share parameters. So the hits payload will the smaller. for example won’t make much sense sending the &dl document.location for all the events if that’s a shared value across all event within the current hit.
POST is now the only accept Method. This will bypass the old GET 1082 bytes limit.
Debugging
Debugging the new measurument protocol v2 has became even easier, since the new properties offer a Debug View.
In order to have our hits showing up here, we’ll need to add a _dbg=1 parameter to our hits.
&_dbg=1
Then our hits will show up in the DebugView report in real time, making our debugging efforts much easier that they actual are.
Turning on the debug on the web based library
If you’re working on a website based implementation you can turn on the “oficial” debugging logs just loading the GTAG container with the &dbg={{randomNumber}} parameter:
Request Payload ( POST ), this will hold the events related data.
The Request Payload will only be available when there’re more than 1 event on the current hit request. If the hit only contains one event, the parameter will be attached to the QueryString as the rest of the common shared parameters
The following code will help us to understand how should be build a hit, and also how to send it to APP+WEB Endpoint using the navigator.sendBeacon function.
// APP+WEB Endpoint
var endPoint = 'https://www.google-analytics.com/g/collect';

// Base Event Model for Web Hit
var eventModel = {
    v: 2,
    tid: 'G-XXXXXXXX-0',
    _p: Math.round(2147483647 * Math.random()),
    sr: screen.width + 'x' + screen.height,
    _dbg: 1,
    ul: (navigator.language || "").toLowerCase(),
    cid: '1908161148.1586721292',
    dl: 'https://appweb.thyngster.com/',
    dr: '',
    dt: 'APP + WEB Measurement Protocol version2 DEMO',
    sid: new Date() * 1,
    _s: 1
}

// A queue to batch our events
var events = [];

var requestQueryString;
var requestBody;

// Let's push some events
events.push({
    'en': 'pageview'
});
// Second Event
events.push({
    'en': 'scroll',
    '_et': '5000',
    'epn.percent_scrolled': '90'
});
// Another more event
events.push({
    'en': 'useless_no_bounce_event',
    '_et': '5000',
    'ep.no_bounce_time': '5sec'
});

// Is there any event in our queue?
if (events.length > 0) {
    // If there's only one event, we'll not pushing a body within our request
    if (events.length === 1) {
        Object.assign(eventModel, events[0]);
    } else {
        requestBody = events.map(function(e) {
            return (Object.keys(e).map(key=>key + '=' + e[key]).join('&'));
        }).join("\n");
    }
    requestQueryString = Object.keys(eventModel).map(key=>key + '=' + encodeURIComponent(eventModel[key])).join('&');
    navigator.sendBeacon(endPoint + '?' + requestQueryString, requestBody);
}
Measurement Protocol Version 2 hit example . Multiple Events.
APP + Web Measurement Protocol v2 Hit Example . Just 1 Event
Parameters Reference
Request Parameters
These parameters are available across all hits. There are related to the current hit.
Parameter
Value Type
Value
v
int
Protocol Version
tid
string
Stream ID ( G-XXXXXXXXX )
cid
string
Client ID Value
sid
string
Session ID . ( current session start TimeStamp )
sr
string
Screen Resolution
_dbg
bool
Debug Switch
ul
string
User Language
_fid
_uci
bool
_p
gtm
string
Container Hash
_s
integer
Session Hits Count
Shared Parameters
Parameter
Value Type
Value
dl
string (url)
Document Location
dr
string (url)
Document Referer
dt
string
Document Title
sid
string
Session ID
sct
integer
Session Count
seg
boolean
Session Engagement
_fv
bool
First Visit
_nsi
bool
New Session Id
_ss
bool
Session Start
cu
string
Currency Code
_c
Event Parameters
Parameter
Value Type
Value
en
string
Event Name
_et
integer
Event Time
up.*
string
User Parameter String
upn.*
number
User Parameter Number
ep.*
string
Event Parameter String
epn.*
number
Event Parameter Number
Ecommerce
NOTE: I want to add that this was live on the latest gtag version one week ago, and that it seems it has been removed. In any case I wouldn’t expect to have changes on the final release.
We’re splitting the parameters related to the Ecommerce on 3 categories. We need to have in mind that APP+WEB have 2 main groups of models for the Enhanced Ecommerce, the Products Model and the Promotions Model.
Products Model, is used in every single ecommerce event that is sent to Google Analytics . Which includes product listings, products clicks, product details views, products adds to cart, products remove from cart, product checkout, products purchases and products refunds.
Promotions Model, this is the second model, this is for the promotions tracking in the Enhanced Ecommerce, since they’re not directly related to a product this is a total aside model used on APP+WEB
Product Items ( Shared Product Related data )
Product List Details ( Product Lists Related data , this goes along with Product Items )
Promotions
Product Items
Products Items are send under it’s own incremental key, &pr1, &pr2 … &prN . Then each of these parameters will hold all the product model info.
As you can see we can split the data within this parameter key by the tilde character ( ~ ) to be able to see a proper Product Model
id: P12345
nm: Android Warhol T-Shirt
ln: Search Results
br: Google
ca: Apparel/T-Shirts
va: Black
qt: 2
pr: 2.0
Parameter
Value Type
Value
pr[0-9]
id
string
Product ID/Sku
nm
string
Product Name
br
string
Product Brand
ca
string
Product Category Hierarchy Level 1
ca2
string
Product Category Hierarchy Level 2
ca3
string
Product Category Hierarchy Level 3
ca4
string
Product Category Hierarchy Level 4
ca5
string
Product Category Hierarchy Level 5
va
string
Product Variant
pr
number
Product Unit Price
qt
integer
Product Quantity
cp
string
Product Coupon
ds
number
Product Discount
Product Impressions
These are the Measurement Protocol related parameters to the products Impressions. They are complimentary to the product items. Expect these on the product impressions and product clicks events
Parameter
Value Type
Value
ln
string
List Name
li
string
List ID
lp
string
List Position
Transaction Related Data
The next table shows the parameters related to the transacion info.
Parameter
Value Type
Value
ep.transaction_id
string
Transaction ID
ep.affiliation
string
Transactionm Affiliation
epn.value
number
Transaction Revenue
epn.tax
number
Transaction Tax
epn.shipping
number
Transaction Shipping
ep.coupon
string
Transaction Coupon
Promotions
And finally the next table shows the parameters related to the promotions tracking. We should expect these parematers to be showing up into the promotion views and promotion clicks events